Most garages do not fail from a lack of space. They fail from the order things got installed. A modular garage cabinet system dropped against the wrong wall becomes expensive shelving you argue with every morning. The same system, planned around studs and traffic zones, turns a two-car garage into a workshop that stays usable through a Columbus winter.
I have been building and organizing garages for twenty years, and I have replaced enough sagging plywood shelves to know the pattern. The cabinet is rarely the problem. The mounting and the layout are.
Here is the order I install in, start to finish, and the reasons behind each step.
Why this order matters
Cabinets are dead load. That is the weight that sits there forever, not the weight you hang on it for a photo. Dead load is what makes a shelf sag in year three, not year one, and it is why the sequence below puts structure before storage.
The second reason is traffic. A garage is a hallway, a shop, and a warehouse sharing one slab. If you place storage before you map movement, you will end up with a cabinet door that hits a car door and a walkway you have to turn sideways to use.
So the order is: structure, layout, base, cabinets, small stuff, and then a reconfiguration plan. Skip step one and nothing after it matters.
Step 1: Find the studs and check the ceiling
Before you order anything, spend twenty minutes with a stud finder and a pencil. Mark the center of every stud along the walls you plan to use, then verify a couple of marks with a thin finish nail. Stud finders lie near electrical panels and on foil-backed insulation.
Most garage walls are framed at 16 inches on center. Some are 24. You will not know until you check, and the cabinet layout depends on it.
While you are up there, look at the ceiling. If you plan to hang anything overhead, you need to know which way the joists run and whether they are dimensional lumber or engineered I-joists. Engineered joists have different limits and often cannot take a point load on the bottom chord. That is a conversation for a structural question, not a guess.
One rule I will not bend: no drywall anchors for anything holding real weight. Not for cabinets, not for overhead racks, not for a bike hook. The anchor is the weak point in every failed install I have torn out.
Step 2: Map the garage in zones before you hang a cabinet
Stand in the doorway and think in three bands.
Eye level to shoulder height is for what you touch weekly: hand tools, fasteners, the charger, the safety glasses. Above shoulder height is seasonal: holiday bins, camping gear, the stuff that comes out twice a year. The floor is for anything heavy or wheeled: mower, compressor, tool chest, bikes.
Then map traffic. Keep a 36 inch clear path from the garage door to the house door. Do not put a cabinet where a car door opens. Keep the trash and recycling near the service door, not at the back wall, or you will carry bags the length of the garage forever.
Sketch it on paper. Ten minutes with a pencil saves a Saturday with a drill.
Step 3: Set the base and deal with the floor pitch
Garage floors slope toward the door so water runs out. That means a level cabinet sits on a floor that is not level, and the gap shows up at the front of the base.
Set the cabinet where you want it, check level front to back, and shim the front feet or base rail until the cabinet is plumb and level. Then fasten it. A cabinet that is shimmed but not anchored will walk.
Fasten into studs through the cabinet's back rail or through a ledger board you install first. A ledger is often the better answer because it lets you hit every stud cleanly and it gives the cabinet a continuous surface to bear against instead of two lonely screws.
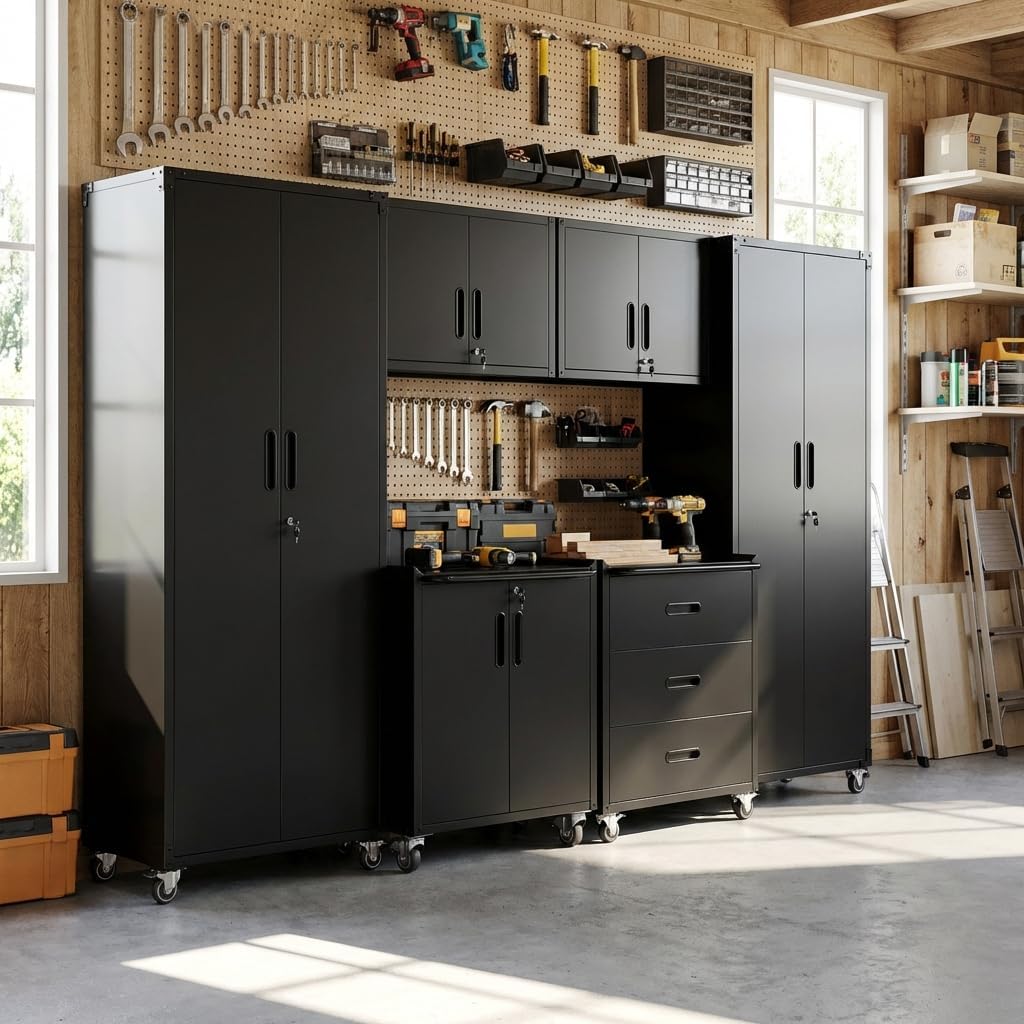
The backbone of the system: Garage Cabinet System | Heavy Duty Steel All-in-One Modular Garage Cabinet Set for Ultimate Workshop Organization | Easy Assembly Garage Storage Cabinets & Tool Bench
 Visit on Amazon →
This is the piece that sets the tone for the whole wall. It is a steel all-in-one set with a tool bench, which matters more than people expect, because a bench built into the run means you stop dragging a folding table out every time you need to set something down. Steel also means the shelves do not care about humidity the way particleboard does, and a Columbus garage swings from swampy to frozen every year.
The modular part is the real selling point. You can start with one run, add to it later, and move a section when the bike collection changes. That is the difference between a system and a shelf.
Two things to check before you buy. First, measure your wall from the corner to the first obstruction, and compare it to the assembled footprint, not the shipping box. Second, confirm where the bench lands relative to your electrical outlets. You do not want to cover the only outlet on that wall.
Flaws but not dealbreakers: All-in-one sets lock you into one finish and one depth. If you want mismatched garage-sale cabinets for character, this is not that. Also, steel cabinets are heavier than they look in the listing photos, so plan on two people for the wall unit and a furniture dolly for the bench.
Anyone organizing a working garage with tools, a bench, and a car that still needs to park inside will get the most out of this.
Step 4: Load cabinets bottom heavy
Now the part that decides whether your shelves stay flat.
Heavy items go on the bottom shelf or the floor of the cabinet. A bench grinder, a case of oil, a box of bolts, all of it low. Middle shelves get hand tools and power tools. Top shelves get light, bulky things: empty coolers, extension cord reels, the box of rags.
This is not just about tipping. It is about the shelf span. Every shelf has a limit, and the limit drops fast when the weight sits in the middle of the span instead of over the supports. Spread the load and keep it low.
Also, do not stack a cabinet to the ceiling just because it fits. Leave the top two inches empty so you can actually get things out without unloading the top shelf first.
Step 5: Move the loose stuff into bins, not onto shelves
Open shelves in a garage collect sawdust, road grit, and spiderwebs. Anything small, seasonal, or messy belongs in a closed container.
Label the bin on the end, not the lid. Stacked bins hide lids. Write the category, not the contents: "Camping," "Christmas," "Painting." If you write "Misc," you have created a bin you will never open on purpose.
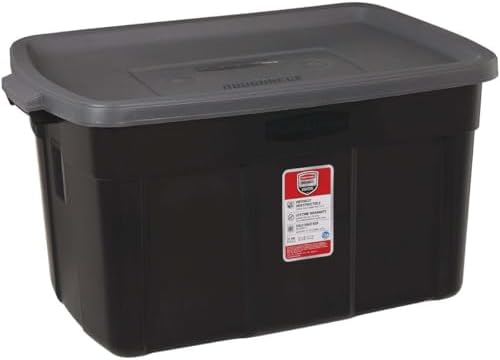
The workhorse bin: Tote
 Visit on Amazon →
Every system needs one boring, repeatable container, and this is that. Buy the same tote in quantity so the stacks actually stack, the lids actually interchange, and a cracked one can be swapped without rethinking the whole shelf. Mismatched bins are why garage shelving looks like a yard sale six months in.
A few practical notes. Measure the tote height against your shelf spacing before you commit to a stack height, because two inches of wasted clearance multiplied by four shelves is a foot of storage you paid for and cannot use. Keep the heavy totes on the bottom. And if you store anything that off-gasses or gets damp, leave the lid cracked, because a sealed bin in a humid garage is a science experiment.
Flaws but not dealbreakers: Generic totes are not rated for stacking loads beyond a few high. If you are going three or four tall with dense contents, put the stack against a wall and keep the heavy ones down low.
Anyone who has ever dug through a cardboard box looking for one extension cord will appreciate a uniform bin wall.
Step 6: Plan the reconfiguration now
A system you cannot change is just expensive shelving. Before you call the job done, walk the wall and ask what happens when you buy a table saw, or when the kids' bikes get bigger, or when the mower dies.
Leave one empty shelf bay and one empty stretch of wall. That is your expansion slot. It costs you a little storage today and saves you a full teardown in two years.
If you use wall track for hooks, note the track height on a piece of tape on the wall. Future you will not remember.
Mistakes I see in almost every garage
Mounting into drywall instead of studs. This is the number one failure, and it fails silently until the day it does not.
Buying cabinets before measuring the wall. The corner, the water heater, the step up to the house door, and the outlet all take bites out of your usable run.
Ignoring the floor pitch. Unshimmed cabinets rock, and rocking cabinets loosen their own fasteners.
Filling the top shelf with heavy things because it is the easiest shelf to reach on install day. It is the hardest shelf to reach on every day after.
Building the system around one car instead of around the walkway. You need to be able to open both car doors and carry a laundry basket past them.
What this costs and how to think about it
The cabinet set is the big line item, and the totes are the cheap part that makes it work. Check current Amazon price on both before you plan, because the cabinet run is what drives the budget, and the bin count is what drives the finish.
The honest math is cost per day over the years you keep the system. A steel cabinet run that survives ten winters and two moves within the garage costs less per day than replacing sagging particleboard every few years, and it does not need a weekend of your life to redo.
Budget one weekend for the structure and the cabinets, and a second weekend for sorting and binning. Anyone promising this in one afternoon has never done it.
Questions I get asked
Do I need a ledger board, or can I fasten straight through the cabinet back? Straight through is fine if the cabinet back rail is solid and you hit studs. A ledger is easier when the back rail is thin or the studs are spaced oddly.
Can I put a cabinet on a wall with a water heater? Leave clearance for service and for the relief valve. You will regret boxing in a water heater.
What if my garage walls are finished with drywall over furring strips? Then the strips, not the drywall, are your fastening surface, and they are often thin. Find the studs behind them and use long enough fasteners to reach.
How high should the bench be? Match the bench height to your standing elbow, roughly 36 inches for most people. Test it with a piece of scrap before you commit.
The short version
Find the studs. Map the zones. Shim and anchor the base. Load it bottom heavy. Put the small stuff in matching bins. Leave room to grow.
That is the whole system. The cabinets are the easy part. The order you do it in is what keeps the wall flat in year five.