Most garage walls fail the same way, and it is never the hook. It is the bracket. Somebody finds what they think is a stud, drives four screws into drywall, hangs a ladder and two bikes, and by spring the rail is peeling away from the wall.
Installing a garage wall storage system is not complicated, but it is unforgiving. Get the layout wrong and you will redo it. Get the anchoring wrong and you will patch drywall. The order of operations matters more than the logo on the box: find the studs, map the wall, mount the rail level and into structure, then build up and out from there.
I have spent 20 years as a general contractor in Columbus, Ohio, and I have organized more garages than most people have parked in. What follows is the process I run on a job, plus the two pieces I would buy first if the wall were mine.
Why you should trust me
I built my first wall system out of plywood and stubbornness. It held a tool chest for about a year and then it started to sag, and I replaced it with real hardware and a stud finder. That is the whole education in one sentence.
Two beliefs shape everything below. First, wall systems are only as strong as the studs behind them, and a spec sheet does not know your drywall. Second, weight ratings are honest only when the mounting hardware matches them. The box will tell you 1,750 pounds. The bracket is what has to live up to it.
I also want to be straight with you about numbers. I am not going to hand you a load test figure I cannot verify on your wall, because the honest variables are your studs, your spacing, and your load. I will tell you what to check and what fails.
How I picked and how I tested
I do not review storage by hanging a box of Christmas lights on it and calling it a day. Four questions decide whether a system earns a spot on my truck.
First, what are the brackets actually made of? Steel beats plastic, always, but plastic has a place when the load is bikes and shovels rather than a loaded chest.
Second, does the mounting hardware match the rating? A 1,750 pound rail attached with drywall anchors is a 40 pound rail. The rating assumes studs and real lag screws.
Third, can I reconfigure it? A system you cannot move around later is just expensive shelving. Track systems win this one because the rail stays and the hooks move.
Fourth, would I trust it with my tools? That is the test that matters, and it is why the two picks below split along a clear line: one is a track for the things that hang, and one is a cabinet run for the things you do not want on open shelves.
The two pieces everything else hangs off
Before you buy hooks, bins, or brackets, decide the backbone. A rail handles the vertical wall, and cabinets handle the floor. Most garages need both, and you can do them in either order.
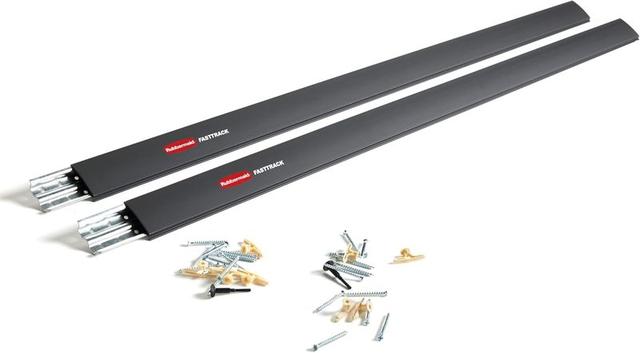
Value pick: Rubbermaid FastTrack Wall Mounted Storage and Organization System Rail Horizontal 48" 2-Pack Holds up to 1750 pounds Each Rail for Home/Garage Storage and Organization
 Visit on Amazon →
This is the value pick and it is the one I put in my own garage. You get two 48 inch horizontal rails, and each rail carries a rating up to 1,750 pounds when it is fastened into studs. Read that number the way it is written: it is a stud rating, not a drywall rating, and it assumes you brought real fasteners.
A rail is a platform, not a shelf. You mount it once, level and into structure, and then you add hooks, baskets, and brackets to it as the garage changes. That is why a track system beats fixed shelving in a house where the bike collection grows every couple of years. The track is plastic, which is the honest tradeoff here, and it is why this is the value pick rather than the heavy duty one. For ladders, shovels, hoses, trimmers, and kids' sports gear, it is plenty, and it goes up in an afternoon once you have located your studs.
Flaws but not dealbreakers: I would not hang a fully loaded tool chest off it. If that is the plan, you want steel track and a different budget.
Anyone who needs the wall working this month without a contractor's invoice will be happy here.
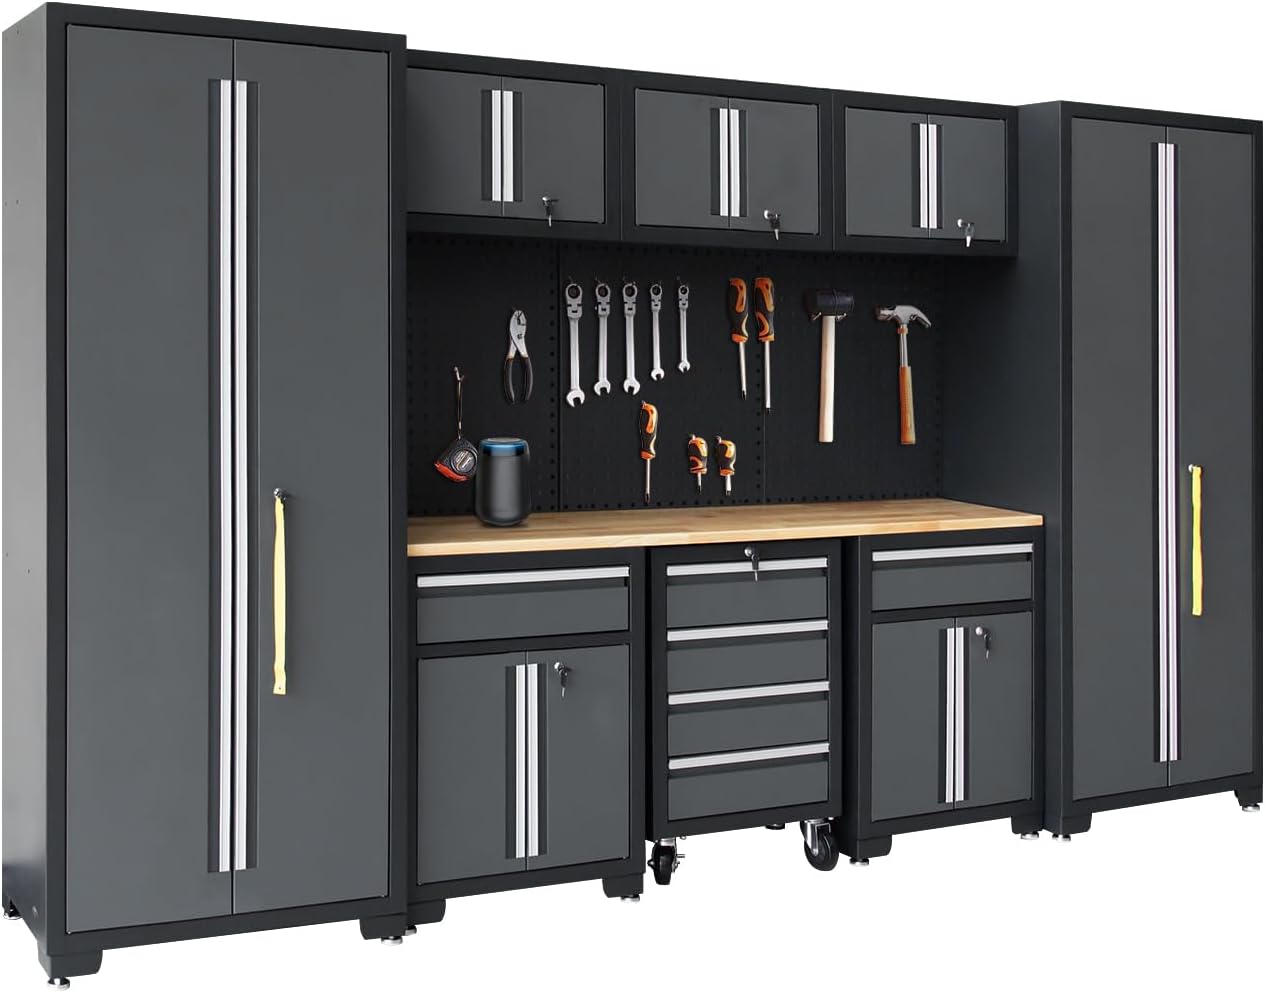
Upgrade pick: Garage Storage Cabinet System 9-Pcs Workshop Set, Black
 Visit on Amazon →
Cabinets beat open shelves for anything you do not want covered in sawdust, and that is most of what lives in a working garage. A nine piece set lets you build a run along one wall instead of stacking plastic totes and hoping, with doors that close and tops that can take a stack.
Two things to plan for before this arrives. Cabinets sit on your garage floor, and garage floors have pitch, the slope that drains water toward the door. You will shim the front feet, and you should buy shims before delivery day, not after. The other thing is sequencing: if you are doing a rail too, install the rail first, because you do not want to be swinging a drill over a finished cabinet run.
Flaws but not dealbreakers: This is a different budget class than a rail, so decide up front whether you are buying storage or building a workshop. The floor footprint is real and it does not fold away.
Anyone whose garage has become the household overflow room should start here rather than with more bins.
How to plan the wall before you drill
Do this part with a pencil and a tape measure, not a drill. It takes an hour and it saves a weekend.
Step one: Find the studs, all of them. A stud finder is the most important tool in garage storage and the one everyone skips. Mark every stud across the wall with painter's tape and write the measurement on the tape. Do not guess from the first one, because garages are full of doubled studs, headers, and one inexplicable gap where the builder did something creative. If you cannot find studs, stop and figure out why before you mount anything.
Step two: Map your zones by use frequency. Put the stuff you touch weekly at eye level. Seasonal gear goes up high. Heavy things live low, near the floor, where you are not lifting them over your head. That is the whole system, and it has nothing to do with which brand you bought.
Step three: Mark the rail height against your tallest user, not your shortest. A rail mounted too low means every bike and ladder has to angle out into the parking space. Check the swing of your car door before you commit to a height.
Step four: Decide what hangs and what stacks. Hanging items go on the rail. Bulky, dust sensitive, and expensive items go in cabinets. Anything that needs a ladder to reach twice a year goes overhead, and overhead is a separate project with its own rules.
The install, step by step
Step one: Snap a level line across the studs. Use a chalk line or a long level, and mark it on the tape, not on the paint. A rail that is a quarter inch out over 8 feet will look wrong every time you pull in.
Step two: Pre-drill into the studs. Pre-drilling keeps the lumber from splitting and keeps your lag screws running true. Match the bit to the shank, not the threads.
Step three: Fasten into structure, never into drywall alone. Drywall anchors sold for overhead and wall storage are the number one thing I get called to fix. If the fastener does not bite wood or a proper anchor rated for the load, it is decoration.
Step four: Check the rail with your body weight before you load it. Grab it and pull down and out. If it flexes at the wall, the problem is the fastening, not the rail. Fix it now while the wall is still easy to reach.
Step five: Load from the bottom up and the inside out. Heavy items closest to the studs, light items at the ends of the run. That keeps the load where the structure is.
Step six: Live with it for a week before you buy more hooks. You will learn more about your garage in seven days of parking in it than in an hour of planning.
Step seven: Add the cabinets last. Shim them, level them, and check that the doors clear each other and the wall before you bolt anything together. Check current Amazon price again if you are adding pieces later, because you may want to buy the run in one order.
The competition and why it lost
Gladiator GearWall is the best wall system for heavy users. The tracks are steel and the hooks do not bend under a tool chest. If your garage is a working shop, that is where your money goes, and it is a different article than this one.
FLEXIMOUNTS overhead racks are the best ceiling storage if you bolt them right. Most installs fail because people use the included drywall anchors on a garage ceiling, which is exactly the mistake this guide exists to prevent. Ceiling work is a separate job with a separate hardware conversation.
NewAge cabinets look great, and the pro grade line is a big jump in price for mostly the same steel. Torin is the budget steel alternative, and the welds are ugly but honest. Both are reasonable, and neither is the value pick here.
None of them are wrong. They are just answers to different questions than the one you asked when you decided to get the wall working.
What this all costs
I am not going to quote you today's price on either piece, because it moves and I would rather you check it yourself. Check current Amazon price on the rail and on the cabinet set, and look at the total as a five year number rather than a Saturday number.
The real cost is not the hardware. It is two weekends, one of which is planning and anchoring, and one of which is loading and re-loading until the layout makes sense. The stud finder you skipped is the cheapest part of the job and the one that decides whether any of it holds.
Do it in that order and the wall outlives the garage. Skip the studs and you will meet me, or somebody like me, in the spring.