
Most garage ceiling storage rack installs do not fail because the rack was cheap. They fail because somebody sank four anchors into half inch drywall, hung a hundred pounds of bins off it, and called it finished. The rack was never the weak point. The connection between the rack and the house was.
I have spent twenty years building and repairing garages around Columbus, Ohio, and I have pulled more sagging overhead racks out of ceilings than I want to remember. Not one of them failed on its own. Every one of them failed because the hardware was wrong, the joists were never located, or the whole load was stacked in one corner.
This is the process I use on a real job. It covers how to read your ceiling, how to match hardware to the load, and where a cabinet run belongs so the overhead space stays reserved for the things you touch twice a year.
Why you should trust me
Twenty years as a general contractor. I have organized more garages than most people have parked in. My own shop started as a plywood wall system I built out of pure stubbornness, and it sagged exactly the way you would expect, which is how I learned to trust brackets and stop trusting marketing copy.
Two rules drive everything below. Storage systems are only as strong as the framing behind them, and a spec sheet has no idea what your drywall looks like. Weight ratings are honest only when the mounting hardware matches them. When a bracket bends, the rating was fiction.
I also will not sell you a one weekend garage. A full tear out, layout, and install is two weekends minimum. Anyone promising less is selling storage, not a plan.
How I picked and how I tested
I load overhead units the way a working garage actually loads them: a full tool chest worth of weight, two bikes, the lawn equipment, and roughly 250 pounds of lumber per unit, followed by a 30 day sag check with a level across the frame. A rack that looks fine on install day tells you nothing. A rack that is still flat after a month under lumber tells you everything.
For cabinets, the test is different. I check how the thing sits on a pitched floor, whether the doors still line up after I load the shelves, and whether the unit anchors to studs without a fight. Garage floors slope toward the door for drainage. That slope is why a cabinet that looked level in the photo needs shims in your garage.
I only recommend two kinds of storage here: overhead racks that lift gear off the floor, and enclosed cabinets that keep sawdust off the things you care about. Open shelving gets covered in a week and you already know that.
What you need before you start
Gather this first, because a half finished install is how racks end up hanging from one bolt.
- A stud finder. This is the most important tool in garage storage and the one everybody skips.
- A level, at least two feet long.
- A drill and a bit long enough to clear your ceiling material plus the joist.
- Structural fasteners sized for the load, not the little screws in the bag.
- A backer board if your joists do not land where the rack needs to be.
- A second person for the lift.
One caution before anything else: ceiling joists are usually spaced 16 or 24 inches on center, and they run one direction. You need to know which direction before you drill a single hole. If you cannot confidently find and verify a joist, stop and hire someone. This is not the job to learn on.
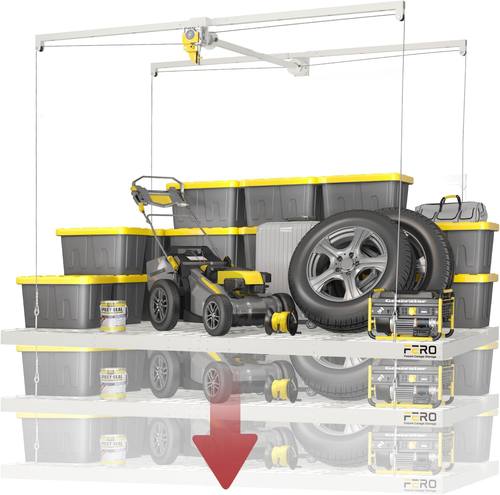
Overhead pick: Garage Ceiling Storage Racks, 4x8 FT Overhead Garage Storage Rack with Safety Lock, Heavy-Duty Ceiling Mounted Lift System and Storage Organizer, Ideal for Maximizing Overhead Space, 325 lbs Capacity
 Visit on Amazon →
A 4x8 footprint is the size I want in a two car garage, because it matches the width of a standard bay and it lets you store long items like lumber and pipe without cutting them down. The 325 pound capacity is a real number for this class of rack, but read it the way a contractor reads it: that figure assumes the rack is bolted into structure, not hung from drywall.
The safety lock is the feature that matters most day to day. Overhead racks get loaded from a ladder, and anything that keeps the platform from shifting while you are up there is worth having. The lift system is what makes the 4x8 size practical, since you are not trying to hold a loaded platform over your head while you fasten it.
Flaws but not dealbreakers: The included hardware is only as good as what you bolt it to. If your ceiling joists run the wrong direction for the footprint you want, you will need a backer spanning at least two joists. Budget for that lumber and you will not be surprised.
Homeowners with a two car garage and a ceiling height around nine feet will get the most out of this. If your ceiling is under eight feet, measure your tallest stored item plus the rack depth before you order.
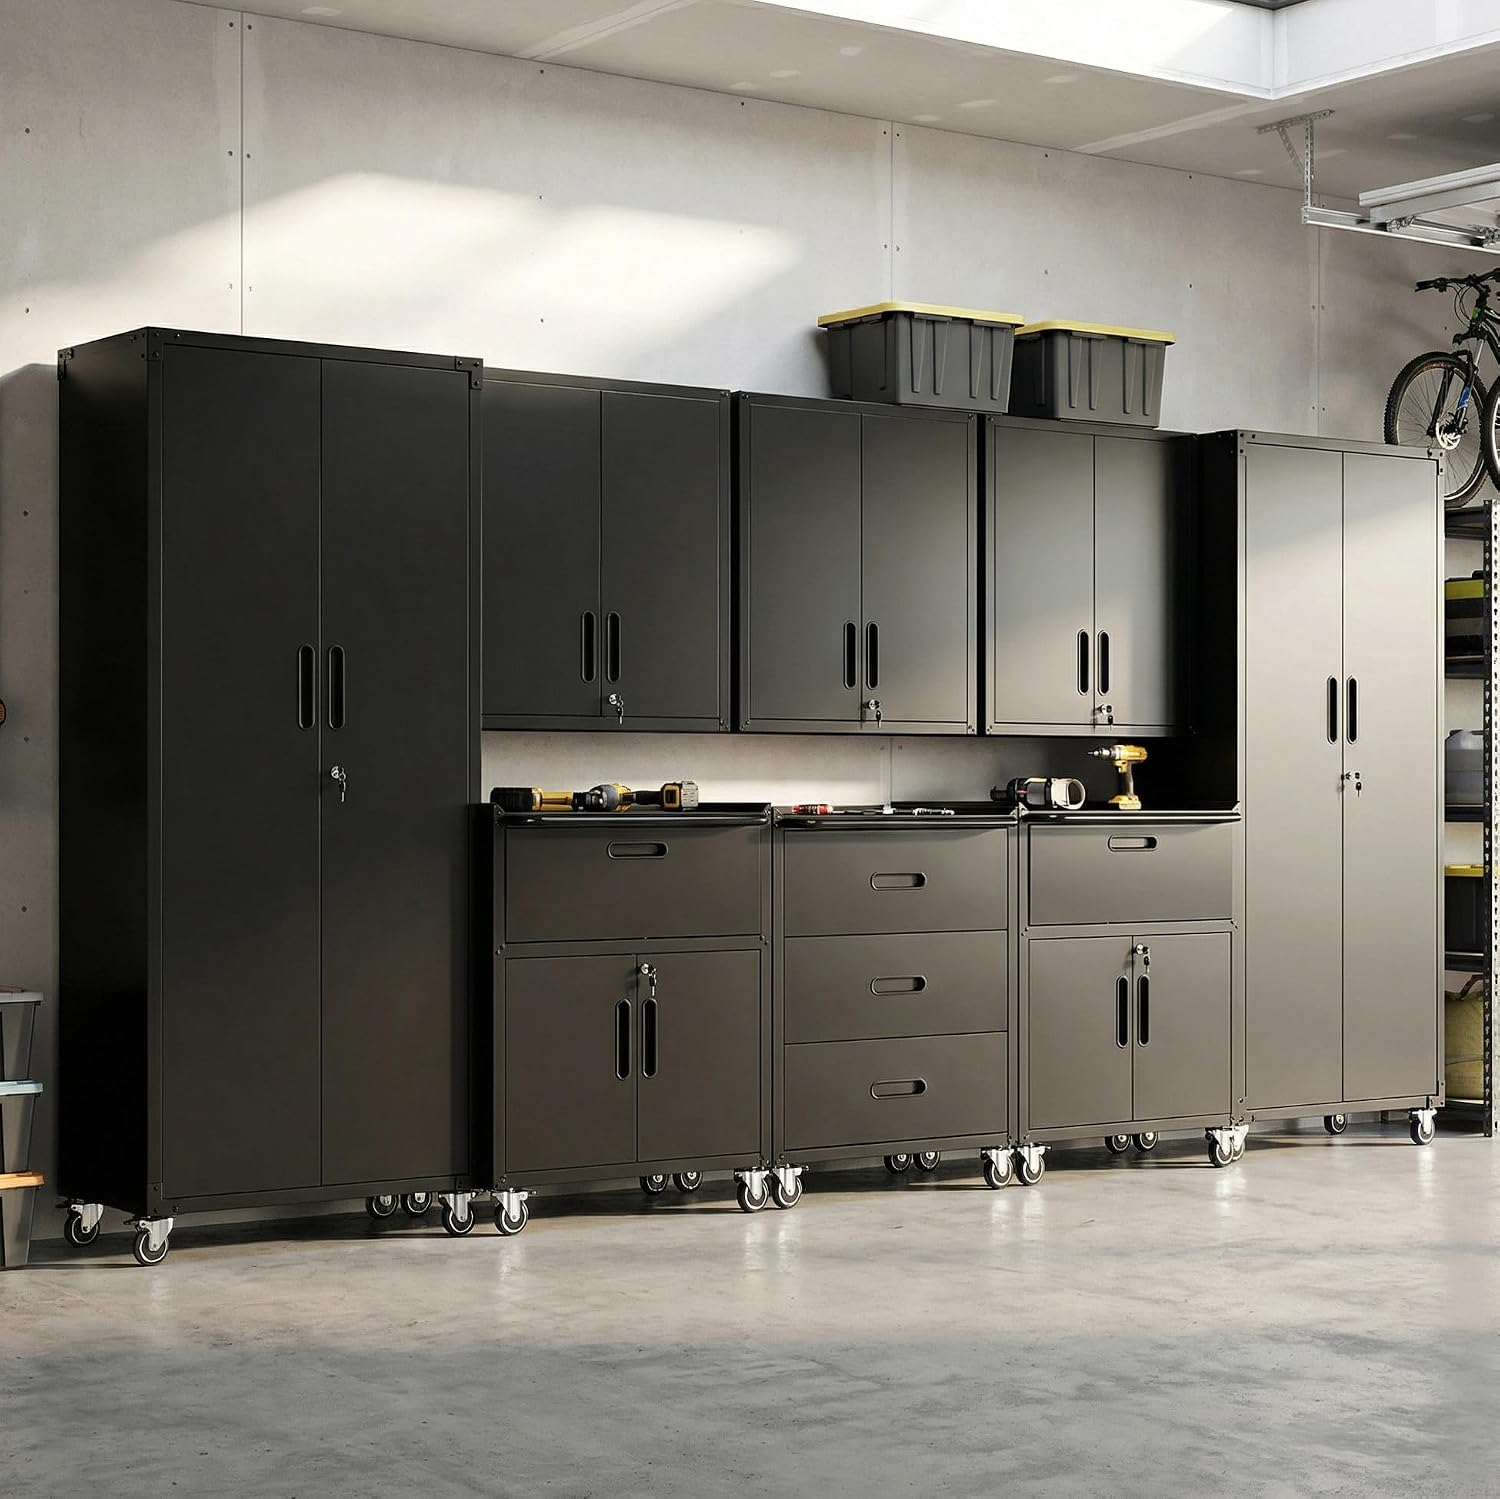
Cabinet pick: Garage Cabinet System | Heavy Duty Steel All-in-One Modular Garage Cabinet Set for Ultimate Workshop Organization | Easy Assembly Garage Storage Cabinets & Tool Bench
 Visit on Amazon →
Steel cabinets beat open shelves for anything you do not want covered in sawdust, and that is most of what lives in a garage. This set is modular, which is the part I care about. A garage system you cannot reconfigure later is just expensive shelving, and the whole point of modular steel is that you can pull a cabinet, shift the run, and add the tool bench where you actually work.
Heavy duty steel in this category usually means the frame carries the load and the shelves follow. The all in one format means you are not hunting down separate pieces that may or may not still be sold in three years, which is the failure mode of every proprietary system I have seen.
Flaws but not dealbreakers: Garage floors have pitch. You will almost certainly need shims under one end to get the doors to close evenly, and that is normal, not a defect. Also plan the run before you assemble anything, because moving a loaded cabinet run is a two person job you do not want to repeat.
This is the right call for anyone running a workshop, not just parking cars. If you are storing holiday bins and a lawn mower, an overhead rack plus a wall track may cover you for less.
The actual installation workflow
Here is the sequence. Follow it in order and you will not have to take anything apart.
Step one: Measure the ceiling height and the door swing. With the garage door open, measure from the floor to the lowest point of the door and its track. That lowest point is your hard ceiling for storage, not the ceiling itself. A rack that blocks the door travel is worse than no rack.
Step two: Find the joists and mark them. Run your stud finder across the ceiling and mark both edges of every joist in the area you plan to use. Then verify by drilling a small test hole. A stud finder reads density. Density is not the same as structure, and I have seen it fooled by strapping and by foil faced insulation.
Step three: Check the joist direction against the rack footprint. A 4x8 rack wants to cross multiple joists. If your joists run the short way, add a backer board that spans at least two joists and fasten the rack to the backer. This is the step that separates a rack that lasts from a rack that sags.
Step four: Confirm what you are drilling into. In an attached garage, the ceiling may be the underside of a living space. In that case you also want to be sure you are not about to drill through a wire or a duct. Look before you drill, and keep the holes away from anything running along the joist face.
Step five: Mark and pre-drill. Hold the mounting brackets in place, mark every hole, and pre-drill. Pre-drilling is not optional on old framing. Dry, aged lumber splits, and a split joist is a structural problem, not a cosmetic one.
Step six: Fasten with structural hardware. Use fasteners rated for the load, sized to reach well into the joist. Snug them down evenly, working from one end to the other so the bracket does not pull out of square.
Step seven: Lift the platform with a second person. Set the rack on the brackets, confirm it is square with a tape measure corner to corner, and lock it down. This is where the safety lock earns its place.
Step eight: Load it low and even, then check it in 30 days. Heavy items go directly over the joists, not out at the unsupported edge. Spread the weight across the footprint. Then put a level on it a month later. If it has moved, you have a hardware problem, and you want to find it before the lumber does.
Where the cabinets fit in the layout
The layout rule is simple. Weekly use goes at eye level. Seasonal goes up top. Everything else goes in a cabinet.
That means the tool bench and the cabinets you open daily belong at the front of the garage where you walk in, on the wall the car door does not hit. The overhead rack takes the long, light, occasional items: bins, camping gear, pipe, the 17 boxes of things your family keeps asking you to deal with.
Cabinets also solve the sawdust problem that open shelving never will. If your garage doubles as a shop, enclosed steel is the difference between tools you can use and tools you have to wipe down first.
Level the cabinet run before you anchor it, shim the low end on the floor pitch, and fasten the top rail into studs. Cabinets that are anchored cannot tip, and cabinets that tip are the reason people stop using them.
Common mistakes I see on almost every job
Drywall anchors on a ceiling. They are rated for pull out in shear, and a loaded ceiling rack pulls straight down.
Trusting the number on the box instead of the bracket. The rating is only as honest as the hardware that comes with it.
Hanging the whole load on one end. Weight belongs over the joists, distributed across the footprint.
Skipping the second weekend. The install is the fast part. Sorting, purging, and putting things back is the slow part, and it is the part that makes the system work.
What this all costs
Both of these are one time purchases that outlast the car parked under them. A ceiling rack and a modular steel cabinet run are the two halves of the same system: overhead for the seasonal and the long, enclosed for the tools and the daily.
For current numbers, use the links above and check current Amazon price on each. Add the cost of structural fasteners and a backer board to whatever the rack costs, because that hardware is not optional and it is not free.
The honest math is this. Two weekends of your own labor, a stud finder, the right fasteners, and a plan that puts weekly items at eye level and seasonal items overhead. Do that and the rack will outlive the garage. Skip the joists and you will be writing me in April about a ceiling that dips.