
Most garage ceiling storage fails for a boring reason. Somebody hung a garage ceiling storage rack from drywall anchors, loaded it with holiday bins and a ladder, and then acted surprised when the ceiling started looking like a hammock. I have pulled racks like that out of ceilings in Dublin, Westerville, and half the subdivisions around Columbus, and the rack itself was almost never the problem. The mounting was.
The good news is that overhead space is the cheapest square footage you own. You already paid for it. A rack and a box of lag bolts cost less than a shed, and you get your floor back, which is the whole point.
Here is the order I actually work in: ceiling first, hardware second, rack third, cabinets last. Skip a step and you will redo the one before it.
Why you should trust me
I have been a general contractor for 20 years, and I have organized more garages than most people have parked in. My own wall system started as plywood and stubbornness, and it sagged exactly the way you would expect a homemade shelf to sag once a loaded tool chest sat on it for a winter. I replaced it with real hardware, and that experience is why I am picky about brackets now.
I test storage the way a contractor uses it, not the way a showroom photographs it: a full tool chest, two bikes, lawn equipment, and the 17 boxes my wife keeps asking me to deal with. If a system cannot handle that load on a Tuesday in February, it is not a system. It is shelving with a marketing budget.
What I check before I recommend anything
Four questions, every time.
What are the brackets made of? Steel beats plastic. Always. A plastic track holding a shovel is fine. A plastic bracket holding a tool chest is a countdown.
Does the mounting hardware match the rating? The box lies, the bracket does not. A rack rated for hundreds of pounds means nothing if the fasteners that came with it are meant for drywall. Weight ratings are honest only when the hardware matches them, and the hardware is the weak point on almost every failed install I have torn out.
Can I reconfigure it? A garage system you cannot change is just expensive shelving. Bikes multiply. Kids get bigger. The setup that works this year is not the setup that works in three years.
Would I trust it with my tools? That is the real test. Not with a box of Christmas lights. With the stuff that would hurt to see on the floor.
Measure the ceiling before you buy anything
This is the step people skip, and it is the step that decides whether your rack fits at all.
Get a stud finder and map the ceiling. Mark every joist hit with painter's tape and then confirm each mark with a small pilot bit, because stud finders lie near metal ductwork and foil-faced insulation. Most garage ceilings are framed 16 inches on center, though trusses and older framing can run 24. That spacing determines how many mounting lines a 4x8 footprint will actually cross.
Then look up, not just at the joists:
- What is above the garage? A bonus room or living space changes what the ceiling is carrying. Trusses are engineered as a system, and hanging a load from the bottom chord of a truss is a conversation to have before you drill, not after.
- Where does the garage door travel? Measure the door in the open position, then add clearance. I have seen more racks destroyed by a door panel than by weight.
- Where is the opener rail and the torsion spring? Keep the rack clear of both. Springs are under real tension and you do not want storage banging into them.
- How high is the ceiling? On an 8-foot ceiling, a rack eats your door clearance. On a 10 or 12-foot ceiling, you have room to keep the rack high and still park a truck underneath.
- Where do the wires and ducts run? Garage ceilings are full of stuff that is not framing. Drill into a romex run once and you will check twice forever.
Write the joist spacing and the door clearance on a scrap of cardboard and take it to the store with you. That is the whole measurement phase.
Overhead storage: the rack that earns the ceiling
Overhead storage is free real estate until the ceiling sags, and a ceiling rack is only as good as the two things holding it: the joists and the fasteners. Pick a rack with a real footprint, because a narrow rack forces you into bin Tetris and you end up storing air.
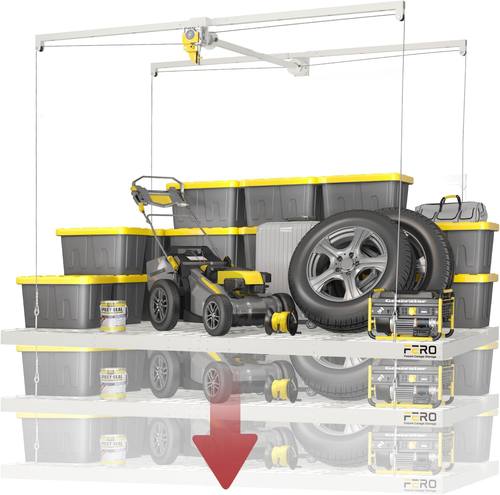
Our pick: Garage Ceiling Storage Racks, 4x8 FT Overhead Garage Storage Rack with Safety Lock, Heavy-Duty Ceiling Mounted Lift System and Storage Organizer, Ideal for Maximizing Overhead Space, 325 lbs Capacity
 Visit on Amazon →
The 4x8 footprint is the reason this one is my pick. That is the size that holds lumber, a ladder, and four matching bins without you stacking things into a pyramid. Laid across joists at 16 inches on center, a 4x8 deck gives you three or four mounting lines, which is exactly what you want, because a rack bolted to one joist is a rack waiting to twist.
The safety lock matters more than people give it credit for. Anything overhead that can shift under a load needs a positive stop, and the lift system is the difference between hanging this with a helper in an afternoon and inventing new words while you hold a deck over your head. Check current Amazon price.
Flaws but not dealbreakers: The capacity number on the box is the rack's number, not your ceiling's. Your joists and your fasteners set the real limit, so plan the load around the mounting points, not the sticker. And no lift system replaces a second person for the first hang. Get one.
Anyone with a two-car garage and a ceiling they have actually inspected will get years out of this. If you have not checked the framing above it, go back one section.
Cabinets: covered storage for the stuff that makes sawdust
Cabinets beat open shelves for anything you do not want covered in sawdust, and that is most things in a working garage. The catch is that cabinets are heavy, they need a floor that is close to level, and they need to be anchored to the wall, not just set against it.
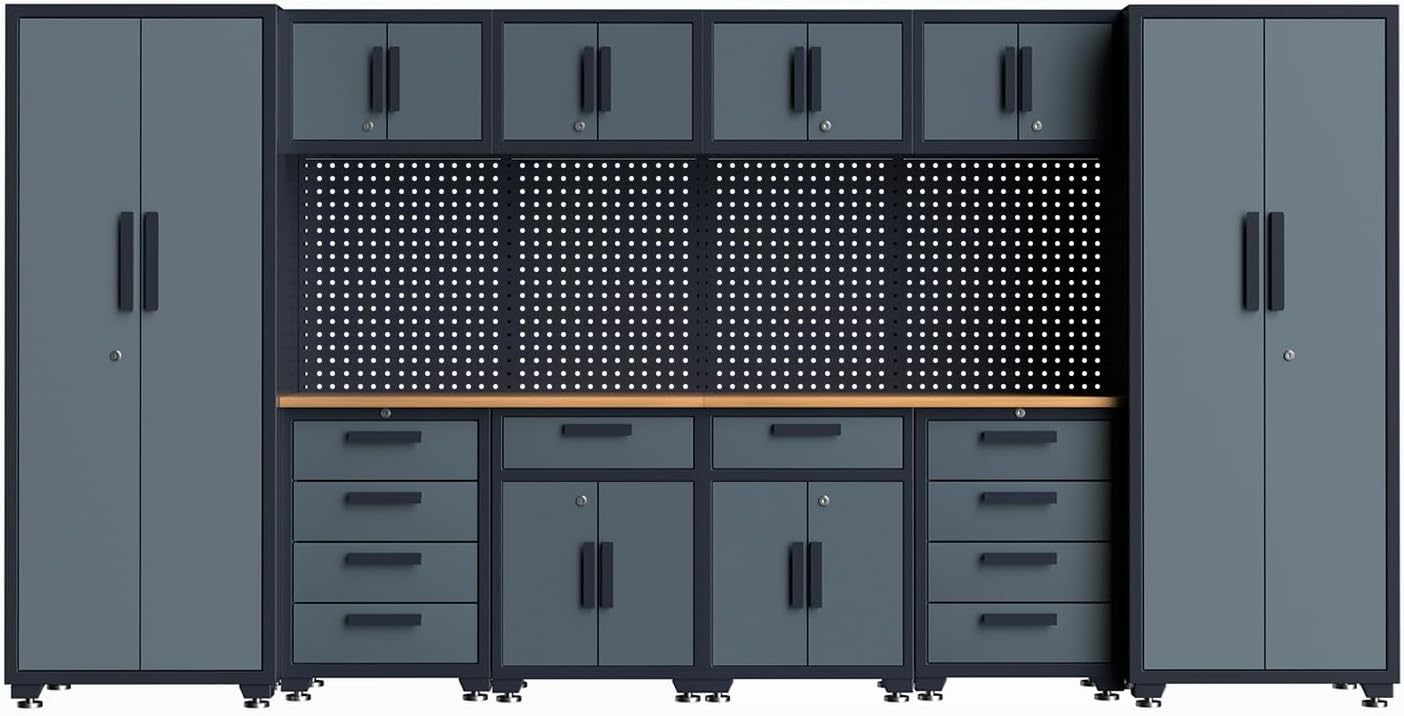
Upgrade pick: Garage Storage Cabinet System 16-Pcs Workshop Set, Gray
 Visit on Amazon →
Sixteen pieces is a lot of system, and that is the point. A modular set lets you lay out a wall the way you actually work: the stuff you use weekly at eye level, seasonal stuff up top, heavy tool storage down low where lifting is not a fight. If you have priced a custom cabinet run lately, you know what the alternative costs. Check current Amazon price.
This is the piece of the project I would buy last, not first. Get the ceiling rack hung and loaded, live with it for a month, and then you will know exactly how much cabinet you need and where it goes. Buying cabinets before you know your traffic pattern is how people end up with a beautiful wall of doors they never open.
Flaws but not dealbreakers: Garage floors have pitch, because they are supposed to drain. Almost every cabinet run needs shims, and a long run needs a base or leveling feet so the doors line up. Budget an afternoon for assembly and a second afternoon for leveling and anchoring.
Anyone whose garage doubles as a workshop will get more out of this than out of another shelf unit. Anyone who only parks in their garage should start with the ceiling rack and wait.
The install workflow, step by step
Step one: Clear the bay and the ceiling line. Move the car, pull the ladders, and get everything out of the footprint. You cannot mark a ceiling with a ladder parked under it.
Step two: Find and confirm the joists. Stud finder first, pilot bit second, tape on every confirmed mark. Mark the full run of each joist you intend to use, not just one hit, so you can see the line.
Step three: Set the height. Measure the garage door in the open position, add your clearance, and measure your tallest vehicle plus a safety margin. The lowest point of the rack is what matters, not the highest.
Step four: Mark the mounting holes. Hold the rack up with a helper or a temporary ledger board screwed to the ceiling, then mark through the brackets. This is the step where a second set of hands saves you an hour and a hole in the wrong place.
Step five: Drill and bolt. Use fasteners sized for the load and long enough to bite into the joist, not just the drywall. Drywall anchors have no business in a garage ceiling. Ever. Pilot drill first so you do not split a joist.
Step six: Hang it level, then check it again loaded. Level on install day means almost nothing. Level with weight on it is the real test. Load it, then re-check and re-tighten after a week.
Step seven: Load it smart. Heaviest items over the mounting points, lighter bins toward the unsupported edges. Keep the weight low and spread out rather than stacked high in one corner.
Step eight: Cabinets last. Shim to level, anchor to studs, and keep anything you care about off the bare floor. Garage floors sweat in the spring, and steel sitting in that moisture will tell you about it.
Where people go wrong
The list is short and it is always the same list. Drywall anchors on a ceiling. One joist instead of three. Forgetting that the garage door has to open. Loading the unsupported edge of a rack because that is where the ladder was easiest to reach. Setting cabinets against the wall without anchoring them, then wondering why the doors drift out of alignment. And trusting a weight rating printed on a box instead of the bracket in your hand.
None of that is a rack problem. It is a planning problem, and every item on the list gets solved before you drill the first hole.
What this all costs
The overhead rack is a one-time spend and it is the cheapest square footage you will ever add to the house. The cabinet system is the bigger line item, and it is still a fraction of what a built-in cabinet run costs. Budget for the extras people forget: good lag bolts if you upgrade the included hardware, a plywood backer board if your joists do not land where you need them, a stud finder you trust, and shims for the cabinet run.
Do the math in cost per day over five years and the rack looks almost free. Do it in cost per hour of your weekend, and the cabinets look cheap too, once you stop moving the same box three times a year.
The short version
Find the joists. Confirm them with a drill, not just a beep. Bolt the rack across at least two of them, ideally three, with fasteners meant for framing rather than drywall. Check your garage door travel before you commit to a height. Load the heavy stuff over the mounting points. Then, and only then, decide how much cabinet wall you actually need.
That is the job. Your ceiling was built to carry a roof. Let it carry your stuff too.