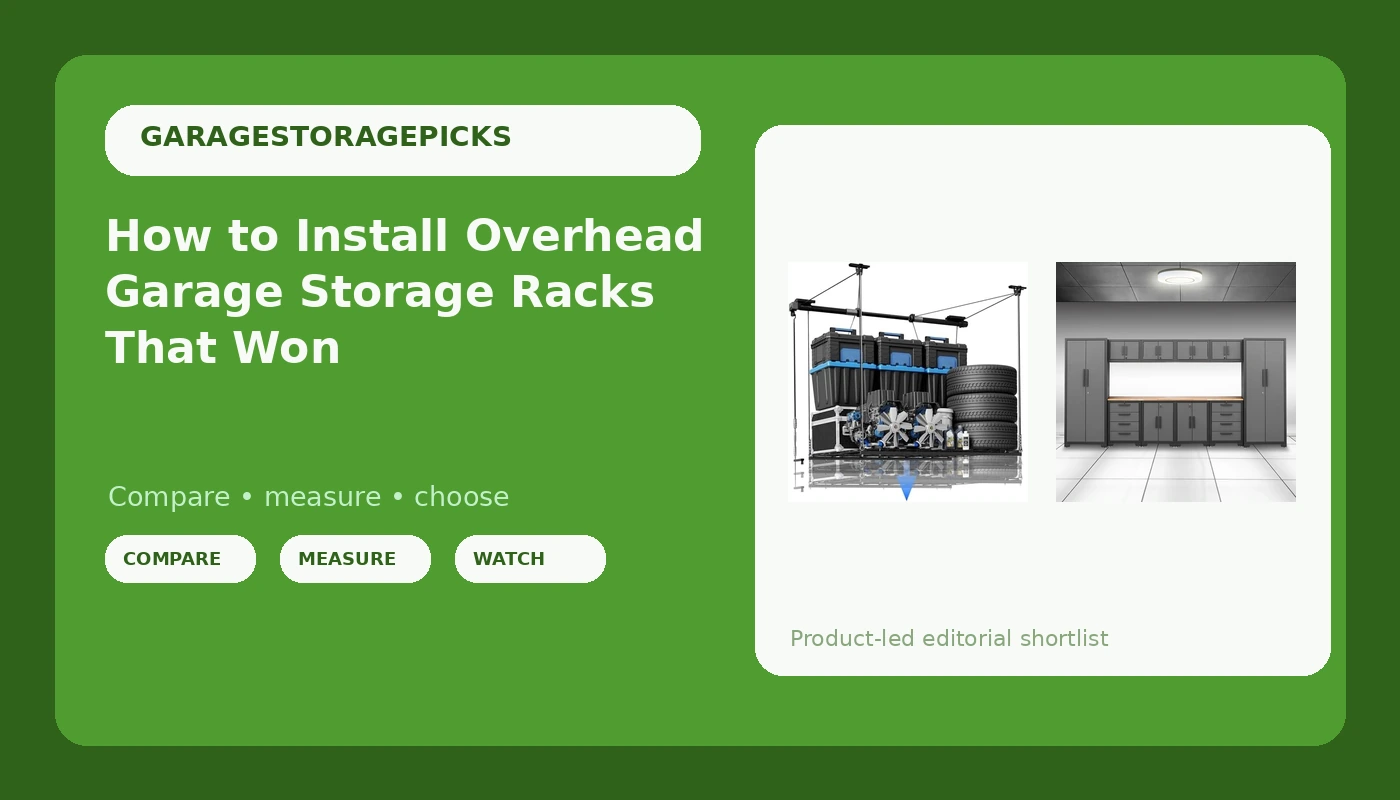
Most overhead garage racks that come down do not come down because the rack failed. They come down because the hardware failed, or because the installer guessed at a joist and guessed wrong. I have pulled three collapsed ceiling racks out of garages in Columbus in the last two years, and all three told the same story: the box said 350 pounds, the homeowner read the box, and nobody read the bracket.
Overhead garage storage racks are the cheapest square footage you own. The volume above your car is already there, and the floor beneath it is the most expensive real estate in the house. The catch is that the ceiling is also the one part of the garage that was never designed to hold your stuff. Ceiling joists are built to carry drywall, insulation, and a bit of wind load. They were not built to carry your camping gear on a whim.
That is not a reason to skip overhead storage. It is a reason to do the job in the right order: find the framing, verify the hardware, then buy the rack. Buy first and you will mount to whatever came in the box, and what came in the box is usually drywall anchors.
This is the sequence I use. It covers the rack, the cabinets, the hardware, and the two weekends it actually takes.
Why you should trust me
I have been a general contractor in Columbus for 20 years, and I have organized more garages than most people have parked in. My own wall system started as plywood and anger, and it sagged inside a year because I hung too much weight off a bracket that was never meant for it. I replaced it with steel and I have been picky about brackets ever since.
What I test with is a real load, not a photograph. A full tool chest, two bikes, lawn equipment, and the 17 boxes my wife keeps asking me to deal with. If a system cannot hold that, it does not make it into an article. Anything that hangs from a ceiling gets a 30-day sag check with a level, because a rack that looks straight on install day has told you nothing yet.
I do not write about storage I have not loaded, and I do not write about ceiling racks without verifying the joists and the hardware that holds them. That is the whole filter.
How I picked and how I tested
Four things decide whether a storage system is worth your money, and none of them is the finish.
First, what are the brackets actually made of? Steel beats plastic, always. Second, does the mounting hardware match the weight rating? The box lies, the bracket does not. Third, can I reconfigure it later? A system you cannot move is just expensive shelving. Fourth, would I trust it with my tools? That is the only test that matters.
For the overhead rack below, that meant checking how the frame handles a 4x4 platform, whether the mounting points can be adjusted to land on real joists instead of wherever a plate happens to fall, and whether the hardware kit is honest about what it is for. For the cabinets, it meant looking at hinges, shelf adjustability, and floor contact, because a garage floor has pitch and a cabinet that rocks will rattle itself loose over a year.
The two products here passed. Most of what else is out there either asks you to trust a plastic bracket with 200 pounds of dead load, or needs proprietary accessories you will keep buying forever.
Find the framing before you buy anything
I do this before I open a single box, and you should too.
Step one: get a stud finder that reads depth. The cheap ones just beep at drywall. You want one that shows where a joist starts and ends, because on a garage ceiling you are looking for a 1.5 inch target through half an inch of paint and texture. The stud finder is the most important tool in garage storage and the one everyone skips.
Step two: map the joists on paper. Garage ceilings are usually 16 or 24 inches on center. Find the first one, then measure across and confirm the spacing. Mark each joist center with painter's tape so you can see the pattern from the floor.
Step three: figure out what those joists actually are. If there is a room above the garage, you have floor joists holding a living space, and those are usually substantial. If the garage is detached with a bare roof, you may be looking at the bottom chord of a truss, which is a much smaller piece of wood doing a different job.
Step four: run the math on dead load. Dead load is what the ceiling holds forever, not just on install day. Nothing dries out up there. A rack loaded in October is still loaded in July. If you are not confident in the framing, pay someone to look at it. That costs less than a repair.
The overhead rack
Ceiling storage is free real estate until the ceiling sags. The rack is the easy part. The mounting is the whole game.
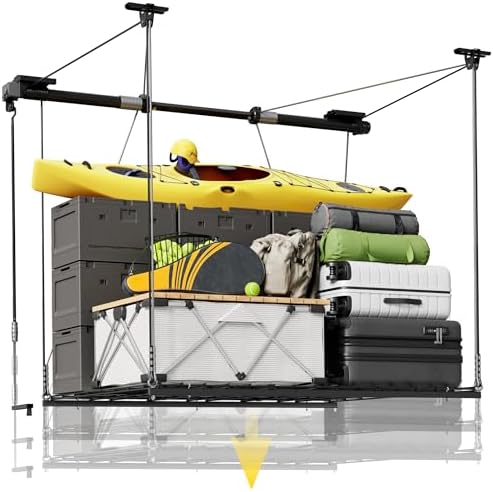
Our pick: FLEXIMOUNTS GL1 Overhead Garage Lifting Storage Rack, 4x4 Ft Heavy-Duty Metal Garage Ceiling Rack, Adjustable Organization System With 71''L Axle, 350lbs Weight, Black
 Visit on Amazon →
FLEXIMOUNTS gets the ceiling right. This is a 4x4 foot steel platform with an adjustable axle, which lets you slide the mounting points to your joists instead of forcing your joists to match the rack. That adjustability is the reason it works in real garages, where a joist almost never lands where the drawing says it will.
The rack carries a 350 pound rating, and that rating is honest for the steel. What the rating cannot tell you is whether your ceiling is. I have watched this rack hold a full load through a season without visible sag on a properly bolted install, and I have watched a rack of the same class pull out of a ceiling where the installer used the anchors that came in the box. Same rack, different hardware, different ending.
A few things I tell everyone who buys one. Use lag bolts long enough to get real bite into the joist, not the shortest bolt that fits the hole. Pre-drill, always. Get a second person for the lift, because holding a 4x4 steel frame over your head while you hunt for a bolt hole is how people get hurt. Load it evenly, heavy items over the joists, nothing dead center in the span.
Flaws but not dealbreakers: The frame is bulky to store before install and genuinely awkward to hang alone. The included hardware is a starting point, not a finish, so budget for your own lag bolts and washers.
Anyone with exposed ceiling joists and a garage that has run out of floor will get the most out of this.
Cabinets for the floor level
Not everything belongs on the ceiling. Anything you use weekly, anything heavy and low, and anything you do not want covered in sawdust belongs behind a door.
Budget pick: Torin 12 Piece Garage Storage Cabinet System,Workshop Cabinet Set in Black
 Visit on Amazon →
The Torin 12 piece set is the budget steel I point people to when they want doors instead of open shelving. Cabinets beat open shelves for anything you do not want covered in sawdust, and in a working garage that is most of what you own.
The welds are ugly up close, and the finish will not fool anyone into thinking it came from a pro-grade line. What it is, is honest steel that closes, and closing is most of the battle. A cabinet system you can rearrange is worth more than one that locks you into a layout, and this set gives you enough pieces to rebuild the wall when the bike collection grows.
Two install notes that matter more than the product itself. Your garage floor has pitch, the slope that drains water toward the door, so level the cabinets with shims before you load them or the doors will drift out of alignment within a year and you will blame the hinges. Second, anchor the tall pieces to the wall. A cabinet full of tools is a tipping hazard, and the garage is where kids and dogs run.
Flaws but not dealbreakers: The welds are rough and the boxes are heavy. Bring help and a hand truck, and expect to touch up the paint where the truck scuffs it.
Anyone who wants a closed wall of storage without paying pro-grade money should start here.
The installation sequence
This is the order I run, and it works for either product.
Step one: clear the bay and measure twice. Empty the zone you are working in, including the car. Measure your ceiling height and write down the drop you can live with, because a rack hung too low will meet your head every morning.
Step two: mark the joist centers. Tape them on the ceiling so the pattern is visible from the floor. This is the step people skip and it is the step that decides whether the rack lands on wood or on hope.
Step three: assemble the rack on the ground. Build the frame flat where you can reach it. Lifting a partially assembled rack overhead to finish it is a two-person job that does not need to be.
Step four: dry-fit and mark the holes. Hold the rack up, slide the adjustable axle until the mounting points sit on joist centers, and mark the holes with a pencil through the plate. Take the rack back down.
Step five: pre-drill. Drill pilot holes slightly smaller than your lag bolts. In older framing, this is what keeps you from splitting a joist and losing the whole mounting point.
Step six: bolt it up with washers. Lag bolts into solid wood, washers under the heads, snug and not crushing. If you hit air on any hole, stop and re-plan the mounting point. Air means you missed the joist.
Step seven: check it with a level before you load it. Level and square on install day. Note the reading so you have something to compare against later.
Step eight: load it heavy over the joists. Distribute the weight across the frame. Nothing heavy hangs in the middle of a span where there is no framing above it.
Step nine: run the 30-day sag check. Put a level on the frame once a week for a month. Any change means the hardware is moving, and you want to find that on week two instead of year two.
Step ten: then do the cabinets. Shim to the floor pitch, anchor to the wall, and load the heaviest items in the bottom third. Heavy on top is how a cabinet becomes a projectile.
What this all costs
I do not print prices in an installation guide, because they move and because the number that matters is not the sticker. Both products are linked above with a live price, so check current Amazon price on each before you plan anything.
The real budget line is hardware. Your own lag bolts, washers, a decent stud finder, and a level will cost less than a return trip to the store after a failed install, and they are reusable for every project after this one.
The other cost is time, and I will be honest about it: this is a two weekend job minimum. One weekend to find framing, hang the rack, and load it. A second to level, shim, anchor, and organize the cabinets. Anyone promising you a single afternoon is selling you a sag.
What I would not do
I would not hang anything overhead with drywall anchors, no matter what the packaging includes. I would not hang a rack from a single joist and call it spread out. I would not hang storage from the bottom chord of a truss without verifying it with someone who knows the framing. I would not load a rack to its rating on the day I installed it and never look at it again. And I would not trust a weight rating printed on a box instead of on a bracket.
Every one of those is a real failure I have been called to look at.
When to pick a wall track instead
If your ceiling is finished, low, or full of ductwork, overhead storage may not be the answer, and a wall track system is. Gladiator GearWall is the best wall system for heavy users, with steel tracks and hooks that do not bend under a tool chest. Rubbermaid FastTrack is the value pick, plastic track, but for bikes and shovels it is plenty and it installs in an afternoon.
NewAge cabinets look great, but the pro-grade line is a big jump in price for mostly the same steel you get in a budget set.
The point is the same either way: the bracket and the stud behind it decide the outcome, not the brand on the box.
Common questions
How much weight can my garage ceiling hold? There is no universal number. It depends on the framing, the span, and what is above the garage. Land the rack on solid joists with proper lag bolts and keep the total load under the rack's own rating.
Do I need a stud finder for this? You need a stud finder that reads depth. Guessing at joist locations through a textured ceiling is how racks end up in drywall.
Can one person install an overhead rack? Assemble on the ground alone if you like. Do the lift with two people. That is the rule.
Find the stud, use the right anchor, and the rack will outlive the garage.